


Azul Unlimited: Abierto un año.
No es exactamente así como pensamos que pasaríamos nuestro aniversario…
Estábamos planeando algunas ofertas especiales de buceo y eventos para todo el mes de abril. Ahora … las fronteras en todo el mundo están cerradas y todos estamos lidiando con una pandemia difícil. Es un momento súper extraño para todos. Hay tanta incertidumbre sobre el virus, la cuarentena y el período de tiempo de bloqueo que nadie sabe exactamente cuando pasar la tormenta.
Sin embargo, a pesar de toda la confusión, una cosa es segura … Estamos muy agradecidos por todas las personas que nos han visitado este año y que continúan apoyando nuestro negocio online.
Azul Unlimited no estaría aquí sin vosotros.
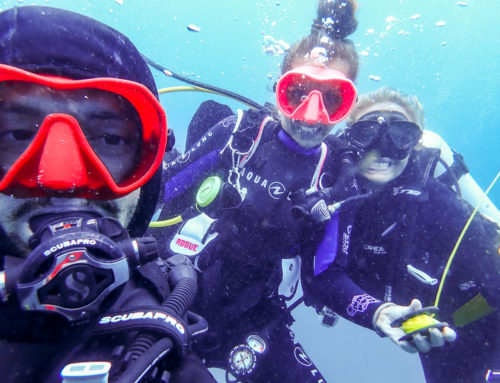
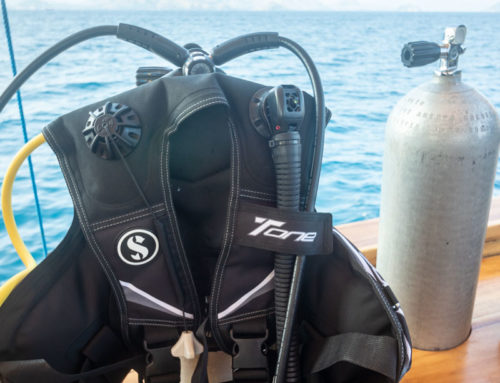
Este sueño comenzó con un destino de buceo (Komodo), un barco (Asmara) y una tienda en la calle principal de Labuan Bajo. Después de toneladas de arduo trabajo, Azul Unlimited ha llegado al # 3 en TripAdvisor con más de 100 reseñas de cinco estrellas. PD: si nos has visitado y no nos ha dejado una reseña, ¡este es tu momento! Nuestro canal de YouTube ha tenido éxito incluso en su pequeño alcance en este momento y nuestras otras redes sociales nos han permitido conectarnos con muchos de vosotros en todo el mundo.
Y en momentos como estos, esa conexión es lo más importante para nosotros. Mantenernos en contacto y dinos qué quieres ver en nuestros canales online.
Qué esperar una vez que volvamos a abrir…
¡No te preocupes, hemos decidido que solo estamos posponiendo nuestras ofertas en nuestro primer aniversario! Si desea conocerlos de primera mano (y obtener ofertas solo para nuestros amigos más cercanos), regístrate en nuestra lista de correo electrónico. Te enviaremos nuestras ofertas especiales y notificaciones para eventos directamente a tu bandeja de entrada.
Nuestro compromiso continuo con el medio ambiente avanza
La pandemia de coronavirus tiene a muchas personas pensando en el planeta y en cómo este cierre ha tenido una influencia tan positiva en la naturaleza. Nuestro objetivo es continuar nuestro apoyo al medio ambiente y continuar esa la mejora aún más este año.
Es posible que ya sepas que adoptamos Batu Bolong el año pasado a través del programa Adopte un sitio de buceo de Project AWARE. En el futuro, realizaremos eventos regulares de limpieza submarina a un precio especial solo para nuestros guerreros ambientales. También habrá nuevos talleres de conservación de tiburones, mantarrayas y propagación de corales disponibles durante todo el año.
En cuanto a los productos ecológicos, Azul busca constantemente formas de apoyar a las comunidades locales en Indonesia. Para nosotros es importante reducir nuestro impacto no solo como empresa, sino también como personas que trabajan aquí. Por lo tanto, además de ofrecer nuestro protector solar ecológico fabricado en Lombok, almacenaremos productos ecológicos (¡y sin plástico!) Como pasta de dientes en polvo, jabón para la ropa, jabones naturales y, para las mujeres, copas menstruales.

Qué hacer hasta que las fronteras se abran nuevamente
Respeta las normas de tu país sobre el distanciamiento social o la cuarentena completa. Todos queremos que esto pase lo más rápido posible, por lo que debemos trabajar juntos. Conéctese con todos los que pueda en online. Aquí en Azul, estamos duplicando nuestros esfuerzos en YouTube para que puedas obtener aún más contenido sobre nosotros en nuestro canal. Mantente positivo, estamos todos juntos en este show de mierda ??
Reserva tu viaje a Komodo e imagínate en Indonesia algún día
Finalmente, si tienes la capacidad y te gustaría apoyar a nuestra pequeña empresa, reserva previamente un viaje de buceo con nosotros. Estas reservas anticipadas no tendrán una fecha de vencimiento, por lo que incluso si no crees que podrás venir durante un par de años, podemos reservarlo. Azul ha tenido un buen primer año, pero seguimos siendo un negocio nuevo y apreciamos cualquier ayuda que podamos obtener mientras intentamos sobrevivir a esta caída en la economía. Si deseas reservar con anticipación, solo envíanos un correo electrónico y te enviaremos más detalles sobre las visitas en el futuro.
¡Os y os apreciamos a todos!
Team Azul Unlimited
Azul Unlimited
Enseñamos a buceadores responsables y protectores del océano. La marca está dirigida por la instructora del personal de PADI IDC, Sarah Valdez, quien enseña buceo en persona y en YouTube. Ahora viaja por los EEUU y México en su furgoneta buceando en lugares nuevos y diferentes. Sigue sus aventuras en YouTube, Instagram, Facebook y TikTok o únete a la comunidad de buceo Azul en Patreon.
Azul Unlimited está asociado con Azul Komodo, un centro PADI IDC en Labuan Bajo, Indonesia, que ofrece viajes de buceo diarios al Parque Nacional de Komodo. ¡Pónte en contacto directamente con su equipo para vivir una experiencia inolvidable buceando en uno de los mejores destinos de buceo del mundo!